
MySQL on Oracle Always free compute instance
MySQL
MySQL is an open-source database management system. It uses a relational database and SQL (Structured Query Language) to manage its data.
Oracle always free cloud instance
Oracle provides true always free cloud instance with very configuration for starting with. You can view the list of services available in this tier on always free details. To start with, you need to go to Oracle’s Cloud Free Tier website and register. You need to give your email and other details including payment methods, but you won’t be charged as long as you choose the Oracle Cloud free-tier products.
Create compute instance
Once account registration is done, then login to your cloud console and create vm instance. To create vm instance, click on the “Create a VM instance” box. Follow the steps and pick the default selected image of Oracle Linux and in network/storage option select “ASSIGN A PUBLIC IP ADDRESS”. In add SSH keys section, select “GENERATE SSH KEYS” and save both public and private keys safely in your local machine.
Note : SSH keys will be shown only at the time of instance creation so be careful and save private keys.
Login to compute instance
Once instance is created, navigate to below and copy the IP address.
Compute -> Instances -> Instance Details
Using this public ip address, login to cloud instance from putty. For logging to cloud instance using putty, you have to use private ssh keys which you should have saved in previous steps.
Installing MySQL
MySQL installation is pretty simple but on Oracle linux MariaDB is the default version of MySQL which gets installed on running below command.
sudo yum install mysql
You can try and see yourself, in case you have installed it by mistake then remove it and move to next step for installing MySQL. Download the repository file from MySQL repository link.
Download repository
In browser navigate to repository page and download the repository for supported linux version. In this case, download MySQL Yum Repository for Oracle linux 7 and install it.
Yum Repository
Verify downloaded file name and install repository using below command
sudo yum localinstall mysql80-community-release-el7-3.noarch.rpm
Install MySQL server.
sudo yum install mysql-community-server -y
Find the temporary password set for MySQL root user.
sudo grep 'temporary password' /var/log/mysqld.log
Update the MySQL root user password.
alter user 'root'@'localhost' identified by 'My@sql@123';
Connect database to MySQL Workbench
Download MySQL Workbench as per operating system.
MySQL Workbench
Installation is simple, follow the on screen steps and once done, connect to database using the vm instance and user details.
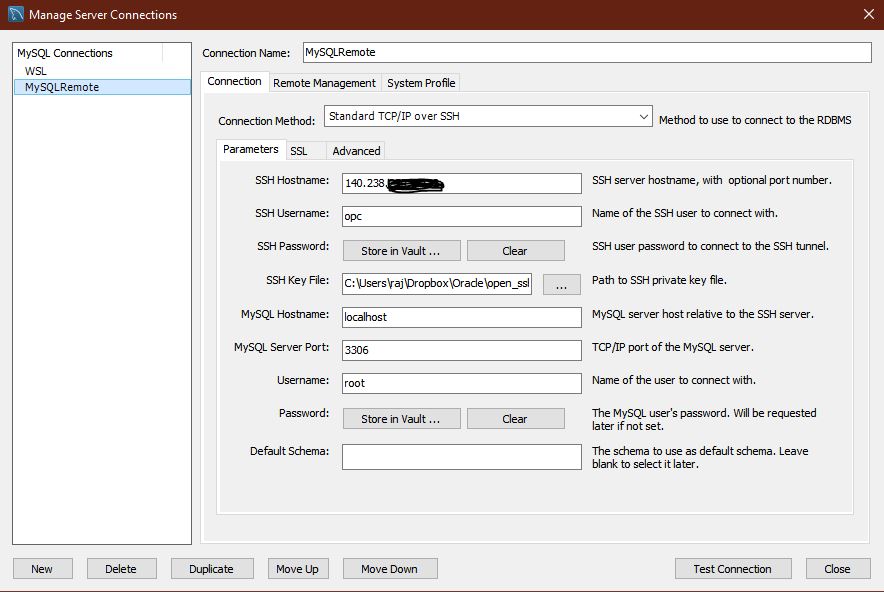
Note: In case you are getting any issue while connecting to database from workbench, try converting Putty key to openSSH format and use that for connecting.
Leave a comment